数独アプリ自動で解かせた
Motivation
point incomeで数独のアプリ300問解いたらクリアの案件あったが自分で解くのがめんどくさかったのでpythonで自動で解かせた。
apps.apple.com流れ
1. PCでiPhoneの画面を共有し盤面をスクリーンショット
LetsViewでwindowsパソコンにiPhone画面を写すようにした。別のソフトでApowerMirrorというものが高画質で提供されてるらしかったけど、レビューに否定的な意見が多くてやめた。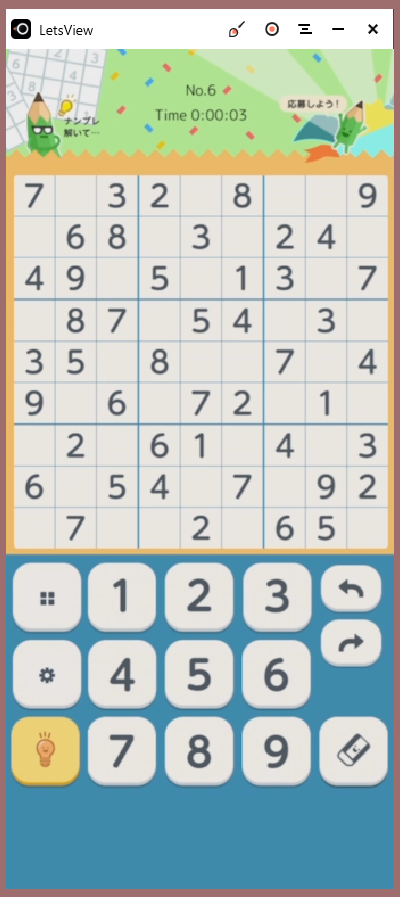
2. スクリーンショットから数字を認識しテキスト形式へ
OCR(Optical Character Recognition/Reader)って技術で画像をテキストにできるらしい。今回はtesseractとpyorcを使ってpythonで画像内の数字を読み取るようにした。
スクショを直接解析しようとするとうまくいかなかったので、画像から数字のある部分をcropして解析しやすい形に直してからOCRすることにした。
- windowsのスクリーンショットは最初はクリップボードに保持されるので、PillowのImageGrab.grabclipboard()で画像を持ってくる。
- 画像内の数字以外の余計な線などをなくす。いろいろいじって、今回のアプリの色使いならHSV形式にしたときの明度が130より小さいものにマスクをかけたら数字だけうまく出てきた。
- cv2.findContours()で数字の輪郭を抽出し画像から数字の書いてある部分をcropできるようにする。その後、行ごとに検出した数字をOCRで認識。
だいたい以上の流れで画像からテキストデータにできる。汚いコードは以下。
# クリップボードから画像取得
    origin_img = ImageGrab.grabclipboard()

    if isinstance(origin_img, Image.Image):
        w_after, h_after = 360, 360
        origin_img = origin_img.resize((w_after, h_after))
        origin_img_np = np.array(origin_img)
        origin_img_hsv = cv2.cvtColor(origin_img_np, cv2.COLOR_RGB2HSV)
        # V > 130 を255に
        mask = (origin_img_hsv[:, :, 2] > 130)
        hsv_filtered = np.copy(origin_img_hsv)
        hsv_filtered[:, :, 2] = np.where(mask, 255, origin_img_hsv[:,:,2])
        gray_filterd = hsv_filtered[:,:,2]
        gray_filterd = 255-gray_filterd

        # 数字の輪郭を検出
        thresh = cv2.adaptiveThreshold(gray_filterd, 255, 1, 1, 11, 2)
        contours = cv2.findContours(thresh, cv2.RETR_LIST, cv2.CHAIN_APPROX_SIMPLE)[0]

        gray_filterd = 255-gray_filterd
        rgb_filtered = cv2.cvtColor(gray_filterd, cv2.COLOR_GRAY2RGB)

        boxes = np.zeros((9, 9, 4))

        # 矩形があるとこを保存
        for cnt in contours:
            x, y, w, h = cv2.boundingRect(cnt)
            r = y//(h_after//9)
            c = x//(w_after//9)
            if w*h > boxes[r][c][2]*boxes[r][c][3]:
                boxes[r][c] = [x, y, w, h]

        boxes = boxes.astype(np.int)
        tools = pyocr.get_available_tools()
        tool = tools[0]
        builder = pyocr.builders.DigitBuilder(tesseract_layout=6)

        txt = ''

        def calc(box):
            x, y, w, h = box
            cropped_img = rgb_filtered[y:y+h, x:x+w]
            cropped_img_pil = Image.fromarray(cropped_img)
            return cropped_img_pil.resize((w_after//9, h_after//9))

        # cropした数字画像を行ごとにつなげてOCR
        for r in range(9):
            # crop処理
            ds = [calc(boxes[r][c]) for c in range(9) if np.sum(boxes[r][c])>0]
            # 連結処理
            tmp = Image.new('RGB', (w_after//9*len(ds), h_after//9))
            for i, d in enumerate(ds):
                tmp.paste(d, (w_after//9*i, 0))

            w_t, h_t = tmp.size
            tmp = tmp.resize((w_t//2, h_t//2))

            # OCR
            txt_i = tool.image_to_string(tmp, lang='eng', builder=builder)
            cnt = 0
            for c in range(9):
                if np.sum(boxes[r][c])>0:
                    txt += txt_i[cnt]
                    cnt += 1
                # 数字以外はピリオド
                else:
                    txt += '.'


.6..84..7..23..5..48..2..61..49.28..95.87..32.28..36.95..24.79..47.91..32..7..14.
こうなる。
3. アルゴリズムで解き結果を表示。
省略。調べたらいろいろ出てくる。
結果
今のところ一秒で答えが出る。
. 6 . |. 8 4 |. . 7
. . 2 |3 . . |5 . .
4 8 . |. 2 . |. 6 1
------+------+------
. . 4 |9 . 2 |8 . .
9 5 . |8 7 . |. 3 2
. 2 8 |. . 3 |6 . 9
------+------+------
5 . . |2 4 . |7 9 .
. 4 7 |. 9 1 |. . 3
2 . . |7 . . |1 4 .

3 6 5 |1 8 4 |9 2 7
1 7 2 |3 6 9 |5 8 4
4 8 9 |5 2 7 |3 6 1
------+------+------
6 3 4 |9 1 2 |8 7 5
9 5 1 |8 7 6 |4 3 2
7 2 8 |4 5 3 |6 1 9
------+------+------
5 1 3 |2 4 8 |7 9 6
8 4 7 |6 9 1 |2 5 3
2 9 6 |7 3 5 |1 4 8
あとはこれをiPhoneのアプリに打ち込めば終了。いい感じ!
肉寿司食べたい。
Delaunay and Voronoi portrait
コード
Opencvでどちらも描画できるらしいのでコピペする。
note.nkmk.me
自分で実装したりもしたけどそれなりに計算に時間がかかるので却下した(ドロネー図実装の参考にしたサイトの方法だとO(n^2), 木をうまく使うとO(nlogn))。
qiita.com
ボロノイ図についてはここが面白い。
ysmr-ry.hatenablog.com
import numpy as np
import cv2


def main():
    img = make_delaunay(path/to/image)

    cv2.imshow("result", img)
    cv2.waitKey(0)


def make_subdiv(img):
    n_point = 10000

    blur = cv2.GaussianBlur(img, (5, 5), 0)
    _, th = cv2.threshold(blur, 0, 255, cv2.THRESH_BINARY+cv2.THRESH_OTSU)
    result = np.zeros((img.shape[0], img.shape[1]))
    rand_xy = []
    cnt = 0
    while True:
        x = np.random.randint(1, img.shape[1])
        y = np.random.randint(1, img.shape[0])
        if th[y][x] == 0:
            rand_xy.append([x, y])
            result[y][x] = 1
            cnt += 1
        if cnt >= n_point:
            break

def make_delaunay(path):
    img = cv2.imread(path)
    img_gray = cv2.cvtColor(img, cv2.COLOR_BGR2GRAY)

    subdiv = make_subdiv(img_gray)

    triangles = subdiv.getTriangleList()
    pols = triangles.reshape(-1, 3, 2)
    img_draw = np.zeros((img.shape[0], img.shape[1]))
    cv2.polylines(img_draw, pols.astype(int), True, 1, thickness=1)
    img_draw = post_pro(img_draw)
    cv2.imwrite("delaunay_cv2.png", img_draw)
    return img_draw


def make_voronoi(path):
    img = cv2.imread(path)
    img_gray = cv2.cvtColor(img, cv2.COLOR_BGR2GRAY)

    subdiv = make_subdiv(img_gray)
    facets, centers = subdiv.getVoronoiFacetList([])
    img_draw = np.zeros((img.shape[0], img.shape[1]))
    cv2.polylines(img_draw, [f.astype(int)
                             for f in facets], True, 1, thickness=1)
    img_draw = post_pro(img_draw)
    cv2.imwrite("voronoi_cv2.png", img_draw)
    return img_draw


def post_pro(img):
    img = (img*255).astype(np.uint8)
    # img = 255-img
    return img


if __name__ == "__main__":
    main()
点群は大津の二値化した画像の黒い方に点を10000個ランダムでうつ。輝度で分けたりいろいろなやり方があるっぽい。
Semantic Instance Segmentation with a Discriminative Loss Function
元画像のpixelごとの特徴量をDNNで抽出し, その座標を学習することでsegmentationを行う手法を学んだ.
今回は以下のリンク先を非常に参考にしています. 画像は論文より引用.
元論文の概要
目的はinstance segmentationのアプローチの提案. 現在主流となっているinstance segmentationの方法はMask-RCNNなどのproposal-basedな方法で, まずオブジェクトのありそうな領域を抽出してからそれぞれの領域に対してsemantic segmentationを行う(前面と背景を分ける). それに対して論文では, それぞれのピクセルの隠れ特徴ベクトル(embeddingsと英語で言う?)をネットワークで出力する方法をとっている. 同じインスタンスのピクセル同士のembeddingsは似たものになるはずだし別のインスタンスのピクセル同士は離れるはず. そういった引力と斥力のようなloss functionを定義することでinstance segmentationを行っている.

loss functionは以下
はそれぞれ引力, 斥力, 正則化のイメージ.
はそれぞれ同じインスタンスの点が集まってほしい半径, 違うインスタンスの点が離れてほしい半径を表すハイパラメータ.
うまく学習させると重なりなどに強いsegmentationが可能になるっぽい.

今回の実験
今回はsemantic気味に円と四角と背景を分けてみる. 合計6つの図形をランダムで作成し, その白黒画像を入力として用いる. 論文ではsemantic segmentationで背景と物体を分けてから物体に対してsegmentationを行っていたが実験では背景も一つのインスタンスとみて分けてみる. ネットワークの出力であるembeddingsはプロットできるように2次元で行った.
nyoki-mtl様の実装と違うところ
- クラスタリングはk平均法ではなく, 物体数がわからないという前提のもとmeanshift法でクラスタリングを行う.
- 論文では元の入力に座標情報を表すチャンネルを加えるcoordconvという方法を採用しているので加える.
- 実装例では教師ラベルが1データに対してインスタンスの数だけ存在しているが, 今回の実験では例えば6個全部四角だった場合に円のラベルが0となりうまく学習されないことがあるので, 1枚のチャンネルに1,2,3と番号を割り当てる方式にした(わかりにくくてすみません). 実装面からみても, 1枚で固定されるこちらの方法の方がよさそう.
ーSGDではなく論文通りにAdamを使用.
DCGANで顔生成
顔生成した.
discriminatorとgenerator
def generator_model(input_shape):
    input_ch = 1024
    inputs = Input(shape=input_shape)
    x = Dense(input_ch*8*8)(inputs)
    x = ReLU()(x)
    x = Reshape((8, 8, input_ch))(x)
    x = BatchNormalization(momentum=0.9)(x)
    x = ReLU()(x)
    x = Deconv2D(input_ch, (4, 4), strides=(2, 2), padding="SAME")(x)
    x = BatchNormalization(momentum=0.9)(x)
    x = ReLU()(x)
    x = Deconv2D(input_ch//2, (4, 4), strides=(2, 2), padding="SAME")(x)
    x = BatchNormalization(momentum=0.9)(x)
    x = ReLU()(x)
    x = Deconv2D(input_ch//4, (4, 4), strides=(2, 2), padding="SAME")(x)
    x = BatchNormalization(momentum=0.9)(x)
    x = ReLU()(x)
    x = Deconv2D(input_ch//8, (4, 4), strides=(2, 2), padding="SAME")(x)
    x = BatchNormalization(momentum=0.9)(x)
    x = ReLU()(x)
    x = Deconv2D(3, (3, 3), strides=(1, 1), padding="SAME")(x)
    out = Activation('tanh')(x)
    return Model(inputs=inputs, outputs=out)


def discriminator_model(input_shape):
    ch_list = [64, 128, 128, 256, 256, 512]
    kernel_list = [4, 3, 4, 3, 4, 3]
    stride_list = [2, 1, 2, 1, 2, 1]
    inputs = Input(shape=input_shape)
    x = Conv2D(
        64, (3, 3), strides=1, padding='same', input_shape=input_shape
    )(inputs)
    for cl, kl, sl in zip(ch_list, kernel_list, stride_list):
        x = noise.GaussianNoise(0)(x)
        x = LeakyReLU()(x)
        x = Conv2D(
            cl, kl, strides=sl, padding='same', input_shape=input_shape
        )(x)
    x = noise.GaussianNoise(0)(x)
    x = LeakyReLU()(x)
    flatten = Flatten()(x)
    x2 = Dense(1)(flatten)
    act = Activation('sigmoid')(x2)
    return Model(inputs=inputs, outputs=act)
迷走した結果こんな感じになった. discriminatorにbatchnormalization入れるならreal imageとfake imageを別々のバッチに入れるとよいらしい.
d_loss_real = discriminator.train_on_batch(
   image_batch, [0.9]*(BATCH_SIZE))
d_loss_fake = discriminator.train_on_batch(
    generated_images, [0]*(BATCH_SIZE))
学習を安定化させるテクニックにノイジーなラベルを使うとよいとあるので0.9にしてみた.
Dにガウシアンノイズ入れたりしたけど意味あるのかこれ.
訓練データ
LFWという顔画像を使用. もとは250*250だがopencvのカスケード分類器で顔を切り取って64*64にreshapeして使う. 例えば左のかっこいいおっさんは右になる.
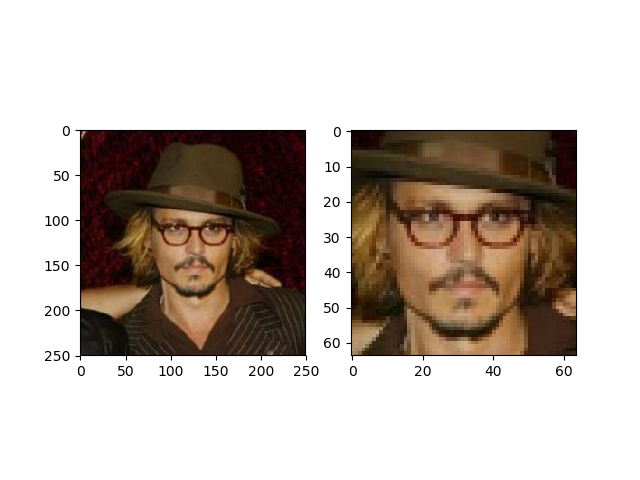
バッチサイズ32で500epoch回す.
結果
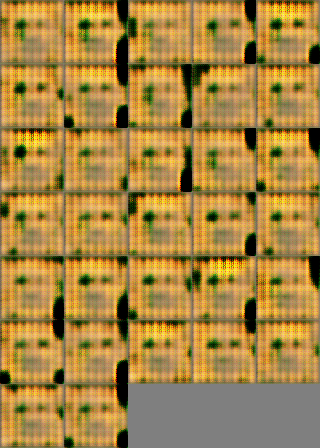
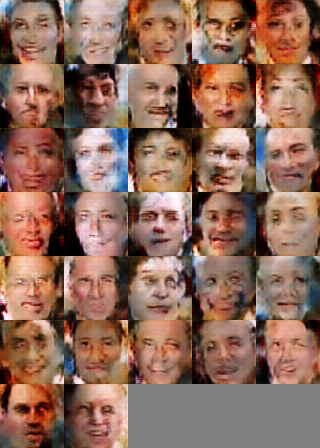
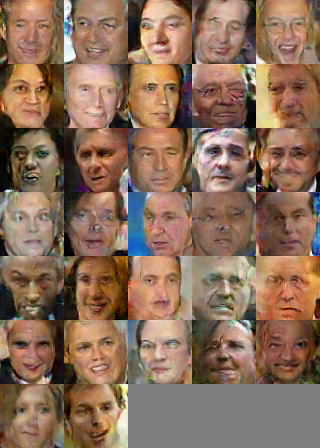
interpolationもしてみた.


次はfeature embeddingについてかこうかな...
pytorchでUnetで白黒画像のカラー化
pytorchでUnetで白黒画像をカラー化した
データセット
STL-10 dataset
pytorchでは簡単にロードできるので今回は"unlabeled"の10万枚の画像をトレーニングに使用した.
image = STL10(root="D:\datasets", split="unlabeled",
                  transform=transform, download=True)
Unet

class Net(nn.Module):
    def __init__(self, in_ch, out_ch):
        super(Net, self).__init__()
        self.inc = d_conv(in_ch, 64)
        self.down1 = down(64, 128)
        self.down2 = down(128, 256)
        self.down3 = down(256, 512)
        self.down4 = down(512, 512)
        self.up1 = up(1024, 256)
        self.up2 = up(512, 128)
        self.up3 = up(256, 64)
        self.up4 = up(128, 64)
        self.outc = nn.Conv2d(64, out_ch, 1)

    def forward(self, x):
        x1 = self.inc(x)
        x2 = self.down1(x1)
        x3 = self.down2(x2)
        x4 = self.down3(x3)
        x5 = self.down4(x4)
        x = self.up1(x5, x4)
        x = self.up2(x, x3)
        x = self.up3(x, x2)
        x = self.up4(x, x1)
        x = self.outc(x)
        return F.sigmoid(x)


class down(nn.Module):
    def __init__(self, in_ch, out_ch):
        super(down, self).__init__()
        self.mpconv = nn.Sequential(
            nn.MaxPool2d(2),
            d_conv(in_ch, out_ch)
        )

    def forward(self, x):
        x = self.mpconv(x)
        return x


class up(nn.Module):
    def __init__(self, in_ch, out_ch, bilinear=True):
        super(up, self).__init__()

        if bilinear:
            self.up = nn.Upsample(
                scale_factor=2, mode='bilinear', align_corners=True)
        else:
            self.up = nn.ConvTranspose2d(in_ch//2, in_ch//2, 2, stride=2)

        self.conv = d_conv(in_ch, out_ch)

    def forward(self, x1, x2):
        x1 = self.up(x1)

        diffY = x2.size()[2] - x1.size()[2]
        diffX = x2.size()[3] - x1.size()[3]

        x1 = F.pad(x1, (diffX // 2, diffX - diffX//2,
                        diffY // 2, diffY - diffY//2))

        x = torch.cat([x2, x1], dim=1)
        x = self.conv(x)
        return x


class d_conv(nn.Module):
    def __init__(self, in_ch, out_ch):
        super(d_conv, self).__init__()
        self.conv = nn.Sequential(
            nn.Conv2d(in_ch, out_ch, 3, padding=1),
            nn.BatchNorm2d(out_ch),
            nn.LeakyReLU(inplace=True),
            nn.Conv2d(out_ch, out_ch, 3, padding=1),
            nn.BatchNorm2d(out_ch),
            nn.LeakyReLU(inplace=True)
        )

    def forward(self, x):
        x = self.conv(x)
        return x
元論文では畳み込みにpaddingが入っていないがこれはミラーリングを加味したものなので今回は入れた. LeakyReLUを使ってるなら入力とか出力とか[-1,1]のほうがよかったなと今は思う.
その他
- lossはF.smooth_l1_loss()
- Tensorにしたりto(device)したりnumpy()したり細かいところ忘れない
- batch_size大きすぎるとout of memory
学習に時間かかったけどkerasよりは全然早かった
kaggleのタイタニックのkernel読んだ
kaggleで誰もが最初に参加するであろうタイタニック号の生存予測のkernelをやっと読み終わったので、その中で出てきたいくつかのモデルの簡単な説明をまとめる。データの前処理については別の機会に。
偉大なMasum Rumi様のkernel
A Statistical Analysis & ML workflow of Titanic | Kaggle
間違いあったら教えてください。
- Cross-validation と Grid Search
- Logistic Regression(ロジスティック回帰)
- K-Nearest Neighbor classifier(K近傍法)
- Gaussian Naive Bayes(ナイーブベイズ)
- Support Vector Machines(SVM)
- Decision Tree Classifier(決定木)
- Bagging Classifier
- Random Forest Classifier
- Gradient Boosting Classifier(勾配ブースティング)
- AdaBoost Classifier
- XGBClassifier(XGBoosting)
- Extra Trees Classifier
- Gaussian Process Classifier(ガウス過程)
- Voting Classifier
Cross-validation と Grid Search
Cross-validation
データセットをk個に分割してモデルの訓練と評価をk回行う。k-1個のデータ群で訓練し残りの1個をテストデータとして評価する。最終的にはk個の評価値の平均をモデルのスコアとする。こうすることでより良い汎化精度の評価ができる。分割方法もいろいろある。
scikit-learn を用いた交差検証(Cross-validation)とハイパーパラメータのチューニング(grid search) - Qiita
Grid Search
Grid Searchではモデルのハイパラメータ候補の組み合わせをすべて試し、最も評価制度の良いものを探索する。例えばSVMのハイパラメータであるgammaとCに対してGrid Searchを行うときは、scikit-learnのGridSearchCVクラスを用いると以下のようなコードになる(参考サイトのものをコピペしました...)。
# ライブラリ
from sklearn.model_selection import GridSearchCV
from sklearn.svm import SVC

# パラメータ
param_grid = {'C':[0.001, 0.01, 0.1, 1,10, 100],
              'gamma':[0.001, 0.01, 0.1, 1, 10, 100]}
print("Parameter grid:\n{}".format(param_grid))

# GridSearch インスタンス生成
grid_search = GridSearchCV(SVC(), param_grid, cv=5)

# パラメータの過剰適合を防ぐためにさらに訓練セットとテストセットを分割
X_train, X_test, y_train, y_test = train_test_split(
    iris.data, iris.target, random_state=0)

# 交差検証を実行
grid_search.fit(X_train, y_train)
print("test set score:{:.2f}".format(grid_search.score(X_test, y_test)))
print("Best parameters:{}".format(grid_search.best_params_))
print("Best cross-validation score :{:.2f}".format(grid_search.best_score_))

# Out
Parameter grid:
{'C': [0.001, 0.01, 0.1, 1, 10, 100], 'gamma': [0.001, 0.01, 0.1, 1, 10, 100]}
test set score:0.97
Best parameters:{'C': 100, 'gamma': 0.01}
Best cross-validation score :0.97
Logistic Regression(ロジスティック回帰)
2クラス分類の一種。ロジスティック関数を用いて0から1の値を出力する。

K-Nearest Neighbor classifier(K近傍法)
クラス判別の手法の一種で、未知のデータから距離が近いK個の学習データを取得し多数決で未知のデータのクラスを推定する教師あり学習。同数にならならないようにKは基本的に奇数にする。画像からわかるようにKの値によって結果が変わる。
K近傍法(多クラス分類) - Qiita
Gaussian Naive Bayes(ナイーブベイズ)
ナイーブベイズはベイズの定理をうまく使って分類を行う確率モデルで、特徴ベクトル間に条件付き独立性を仮定しているところがナイーブってことらしい。Gaussian Naive Bayesは特徴ベクトルに正規分布を仮定したモデル。
Naive Bayesの復習(導出編) - LESS IS MORE
Support Vector Machines(SVM)
Support Vector(境界面に一番近い、つまり重要であると考えられるベクトル)と境界面との距離が最大になるように境界面を決定する2クラス分類器。マージン最大化により境界面を決定する。
平面による識別ができないようなデータに対しては、非線形変換を施した先の空間で線形識別を行う。これにはカーネル法がよく用いられる。
Decision Tree Classifier(決定木)
木構造を用いて分類や回帰を行う機械学習の手法。下のサイトがわかりやすい。
[入門]初心者の初心者による初心者のための決定木分析 - Qiita
Bagging Classifier
学習データから新しいデータセットを抽出してそれをもとに弱学習器を構築する。同じようにして弱学習器をいくつか作り最終的にそれらの多数決で意思決定を行うアンサンブル学習の手法の一種。並列処理が可能。
Random Forest Classifier
Bagging Classifierにおいて、弱学習器に決定木を用いたものがランダムフォレスト。特徴量もある程度ランダムに抽出するので弱学習器が多様なものになり性能があがるとかなんとか。
【アンサンブル学習】多様性が大事? バギング・ランダムフォレスト編 - Np-Urのデータ分析教室
Gradient Boosting Classifier(勾配ブースティング)
バギングと似ているが新しい弱学習器を作るときにそれまでに作られたすべての弱学習器の結果を利用するのがブースティング。バギングと比べると並列処理できず時間がかかるが、間違ったものをうまく識別できるようになる。損失関数を最小化する問題として再定義することで勾配情報を利用するので勾配。

AdaBoost Classifier
adaptive boostingの略。gradient boostingより前にできた。gradient boostingとの違いは、gradient boostingは残差に着目して重みを更新していくところ。特にいうことがない。
機械学習⑤ アダブースト (AdaBoost) まとめ - Qiita
XGBClassifier(XGBoosting)
Gradient BoostingとRandom Forestsを組み合わせたアンサンブル学習。勾配計算とか違うらしいけど詳しく見てない。でもよく使われるから覚えておいて損はないっぽい。
kefism.hatenablog.com
Extra Trees Classifier
random forestは分割させる位置になんかしらの基準があるが、それの単純にランダムで選択するバージョン。過学習しにくい、学習が速いなどのメリット。
Random Forest とその派生アルゴリズム - Sideswipe
Gaussian Process Classifier(ガウス過程)
ガウス過程とは集合の同時確率分布がN次元ガウス分布であるような過程のこと。うまく既知パラメータの相関関係が推定できればn+1個目のデータに対するパラメータを推測できるんじゃないかということらしい。わからん。
Voting Classifier
複数の(種類の)学習器を組み合わせて最後に平均をとる分類器。多数決をそのまま結果とするhard voteと予測した確立に対してweightをかけるweak voteがある。
Python3による日本語言語処理 (5)VotingClassifierによる異なるモデルのアンサンブル学習 - Qiita
最後駆け足になりました。_(._.)_ガウス過程はよく聞くし宿題。
DCGANやってみた
年末にパソコンを自作してグラボが使えるようになったのでCPUだけだときつそうだったGANを試してみることにした。
丁寧に解説してるサイトはいくらでもあるので適当に説明する。
↓パクった参考にしたサイト
elix-tech.github.io
GAN(Generative Adversarial Network)
生成器(generator)と識別器(discriminator)の二つのモデルを同時に学習させて、お互いがお互いに勝てるように競争してくイメージらしい。ガンとギャンどっちなんでしょうか。
DCGAN(Deep Convolutional GAN)はその名の通りCNNを取り入れたGANのことで、様々なテクニックで学習がうまくいくように工夫している。
ソースコード
from keras.models import Sequential
from keras.layers import Dense,Activation,Reshape
from keras.layers.normalization import BatchNormalization
from keras.layers.convolutional import UpSampling2D,Conv2D

# 生成モデル
def generator_model():
    model = Sequential()
    # 入力は100次元のノイズ
    model.add(Dense(1024,input_dim=100))
    model.add(BatchNormalization())
    model.add(Activation('relu'))
    # あとで(128,7,7)にreshapeするため
    model.add(Dense(128*7*7))
    model.add(BatchNormalization())
    model.add(Activation('relu'))
    model.add(Reshape((128,7,7),input_shape=(128*7*7,)))
    # UpSamplingで画像を2倍に拡大
    model.add(UpSampling2D((2,2)))
    model.add(Conv2D(64,(5,5),padding='same'))
    model.add(BatchNormalization())
    model.add(Activation('relu'))
    # UpSamplingで画像を2倍に拡大
    model.add(UpSampling2D((2,2)))
    model.add(Conv2D(1,(5,5),padding='same'))
    model.add(Activation('tanh'))
    # 二回UpSamplingを行うことにより最終的に28*28の画像になる
    return model

from keras.layers.advanced_activations import LeakyReLU
from keras.layers import Flatten,Dropout

# 識別モデルCNN)
def discriminator_model():
    model = Sequential()
    # プーリングの代わりにストライド2の畳み込みを行う
    model.add(Conv2D(
        64,(5,5),strides=(2,2),padding='same',input_shape=(1,28,28)
    ))
    # 活性化関数はLeakyReLUを使用
    model.add(LeakyReLU(0.2))
    model.add(Conv2D(128,(5,5),strides=(2,2)))
    model.add(LeakyReLU(0.2))
    model.add(Flatten())
    model.add(Dense(256))
    model.add(LeakyReLU(0.2))
    model.add(Dropout(0.5))
    model.add(Dense(1))
    model.add(Activation('sigmoid'))
    return model

import math
import numpy as np

# 生成画像表示用の関数
def combine_images(generated_images):
    total = generated_images.shape[0]
    cols = int(math.sqrt(total))
    rows = math.ceil(float(total)/cols)
    width,height = generated_images.shape[2:]
    combined_image = np.zeros((height*rows,width*cols),dtype=generated_images.dtype)
    for index,image in enumerate(generated_images):
        i = int(index/cols)
        j = index%cols
        combined_image[width*i:width*(i+1),height*j:height*(j+1)] = image[0,:,:]
    return combined_image

import os
from keras.datasets import mnist
from keras.optimizers import Adam
from PIL import Image

BATCH_SIZE = 32
NUM_EPOCH = 20
GENERATED_IMAGE_PATH = 'keras_dcgan_generated_images/'

def train():
    # 訓練データのみ必要になる
    (X_train, _), (_, _) = mnist.load_data()
    # -1~1の範囲にする
    X_train = (X_train.astype(np.float32) - 127.5)/127.5
    # おそらくRGBとかなら第二引数は3になる
    X_train = X_train.reshape(X_train.shape[0], 1, X_train.shape[1], X_train.shape[2])

    discriminator = discriminator_model()
    d_opt = Adam(lr=1e-5, beta_1=0.1)
    discriminator.compile(loss='binary_crossentropy', optimizer=d_opt)
    # generatorの学習時はdiscriminatorの学習は行わない
    discriminator.trainable = False
    generator = generator_model()
    # 生成モデルの訓練はdiscriminatorも用いて行う
    dcgan = Sequential([generator, discriminator])
    g_opt = Adam(lr=2e-4, beta_1=0.5)
    dcgan.compile(loss='binary_crossentropy', optimizer=g_opt)

    num_batches = int(X_train.shape[0] / BATCH_SIZE)
    print('Number of batches:', num_batches)
    for epoch in range(NUM_EPOCH):

        for index in range(num_batches):
            noise = np.array([np.random.uniform(-1, 1, 100) for _ in range(BATCH_SIZE)])
            image_batch = X_train[index*BATCH_SIZE:(index+1)*BATCH_SIZE]
            generated_images = generator.predict(noise, verbose=0)

            if index % 500 == 0:
                image = combine_images(generated_images)
                image = image*127.5 + 127.5
                if not os.path.exists(GENERATED_IMAGE_PATH):
                    os.mkdir(GENERATED_IMAGE_PATH)
                Image.fromarray(image.astype(np.uint8))\
                .save(GENERATED_IMAGE_PATH+"%04d_%04d.png" % (epoch, index))

            X = np.concatenate((image_batch, generated_images))
            y = [1]*BATCH_SIZE + [0]*BATCH_SIZE
            d_loss = discriminator.train_on_batch(X, y)

            noise = np.array([np.random.uniform(-1, 1, 100) for _ in range(BATCH_SIZE)])
            # generatorの学習時にはラベルはすべて1
            g_loss = dcgan.train_on_batch(noise, [1]*BATCH_SIZE)
            print("epoch: %d, batch: %d, g_loss: %f, d_loss: %f" % (epoch, index, g_loss, d_loss))
    # 重みの保存
    generator.save_weights('generator.h5')
    discriminator.save_weights('discriminator.h5')

if __name__ == "__main__":
    train()
ほとんど写経でConvolution2DをConv2Dにしたりコメントをつけ足したりした。discriminatorへの入力を-1から1にしたのはLeakyReLUの特性を生かすためなのかな。

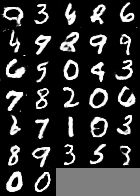
おまけでfashion-mnistとひらがなデータセットを使ってやってみた。fashion-mnistはTシャツのみを取り出し、ひらがなの方はグレースケールに変換したりしてから学習を始めた。


Tシャツの方は結構わかりやすい。ひらがなは50文字以上もあるから難しいかな。


